Most students find chemistry difficult as a theory, but they are fascinated by the experiments. Chemistry is more than just a subject taught in schools; it is also the science of explaining the world at the molecular level. A standout characteristic of an interest in chemistry is its ability to be more research-focused or experiential and hands-on.
However, coming up with concepts for chemical projects might be tough. The goal is to find projects that are both engaging and possible within the limits of time and budget, as well as to teach vital chemical concepts. Let’s look at some interesting chemical projects that are both fun and educational.
10 Best Chemistry Projects for High School
Elephant Toothpaste
Elephant toothpaste is always at the top of the list of fun chemical experiments for people of all ages. It is a simple yet fascinating experiment that captivates students of all ages.
Elephant toothpaste is a frothy substance that results from the rapid breakdown of hydrogen peroxide in the presence of household dish soap. This experiment is also known as the “marshmallow experiment” because of the bubbly foam it produces! It is a popular class demonstration/party trick for children because it is a simple experiment with readily available components.
The essential idea behind the reaction is that hydrogen peroxide (H2O2) breaks down over time to produce water and oxygen (H2O + O2).
2H2O2 (aq) ⟶ 2H2O (l) + O2 (g)
A catalyst accelerates this process. Massive volumes of foam are created when oxygen and dish soap interact.
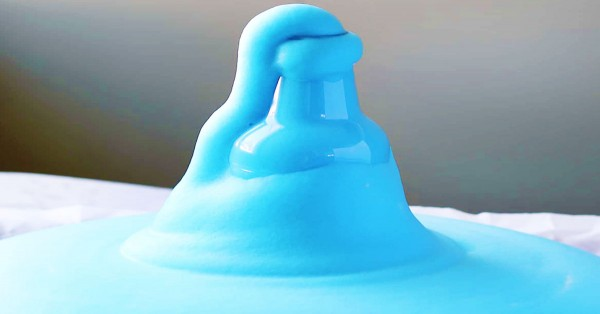
[Image source: https://aussiechildcarenetwork.com.au]
NOTE: The foam may overflow from the bottle, therefore do this experiment on a washable surface or on a tray.
CAUTION: The unreacted hydrogen peroxide may irritate the skin and eyes. Read the safety label on the hydrogen peroxide bottle and wear safety goggles.
Making Slime
Slime is a weird substance with multiple forms. It exists in both liquid and solid states. Slime is a non-Newtonian fluid, which means its condition is determined by the amount of force given to it. When you carry slime from hand to hand, it feels almost liquid and glides quite effortlessly. However, if you poke it hard, it feels solid. Slime can be made at home or in the lab with only a few simple ingredients. These substances undergo a chemical reaction to produce the slime we all know and enjoy.
You’ve undoubtedly got a package of borax in your laundry room and used it to remove the tomato sauce stain from your shirt. Borax is a boron chemical, sometimes known as sodium tetraborate decahydrate. It is a bleaching agent and a cleaning additive. However, borax is more than simply a stain remover; it is one of the primary elements in gooey, elastic slime.
A long and thin polymer molecules can be formed by mixing borax and liquid glue. When force is applied to the slime, these polymer molecules bind together, making the solution appear solid. When the slime is poured from hand to hand, the polymer molecules interact, making the solution appear more liquid.
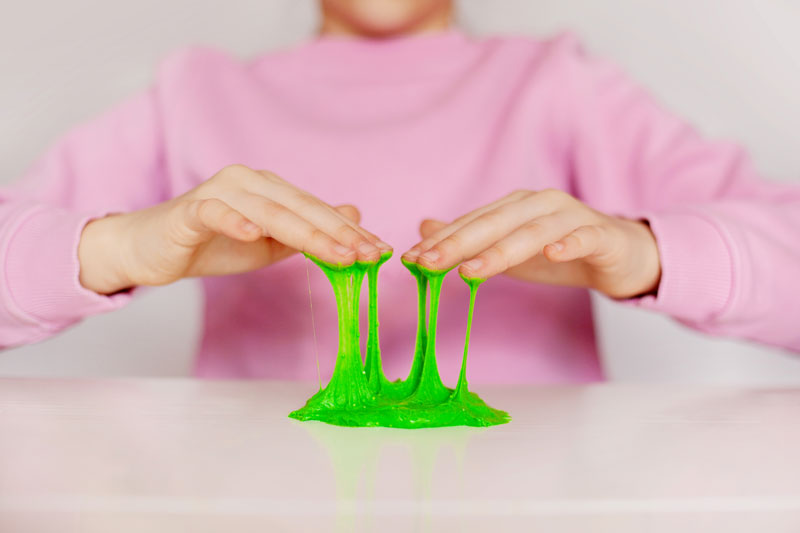
[Image source: https://slimelabexperience.com/]
CAUTION: Make sure not to get borax in your eyes or mouth. It will irritate and be poisonous if consumed.
Burning Steel Wool
Students experiment with burning steel wool in open and closed environments to learn about chemical reactions. This is a great example of chemical reactions and mass conservation. Steel wool is torched, increasing its bulk. Steel wool is largely composed of iron (approximately 98%). Steel wool is made up of many tiny strands. These iron threads have a large surface area that is surrounded by pockets of oxygen. When both battery terminals come into contact with the steel wool, the battery’s electrons travel quickly through it, forming a complete circuit. The electrical current causes the wire to heat up to 700 degrees.
The heat causes the iron to react with the oxygen present in the steel wool. This reaction produces the visible spark as well as the release of heat, which heats the following iron molecules, generating a chain reaction across the steel wool. The extremely intense light is caused by the high temperatures. This chemical interaction between iron and oxygen also produces a new molecule called iron oxide (FeO2). Iron oxide is heavier than iron, hence the final product is heavier than the initial steel wool.
This experiment demonstrates an exothermic reaction, which is a chemical reaction that releases energy in the form of heat. Steel wool turns greyish after burning and cannot be ignited again. This is evidence that the steel wool was chemically transformed into the compound iron oxide.
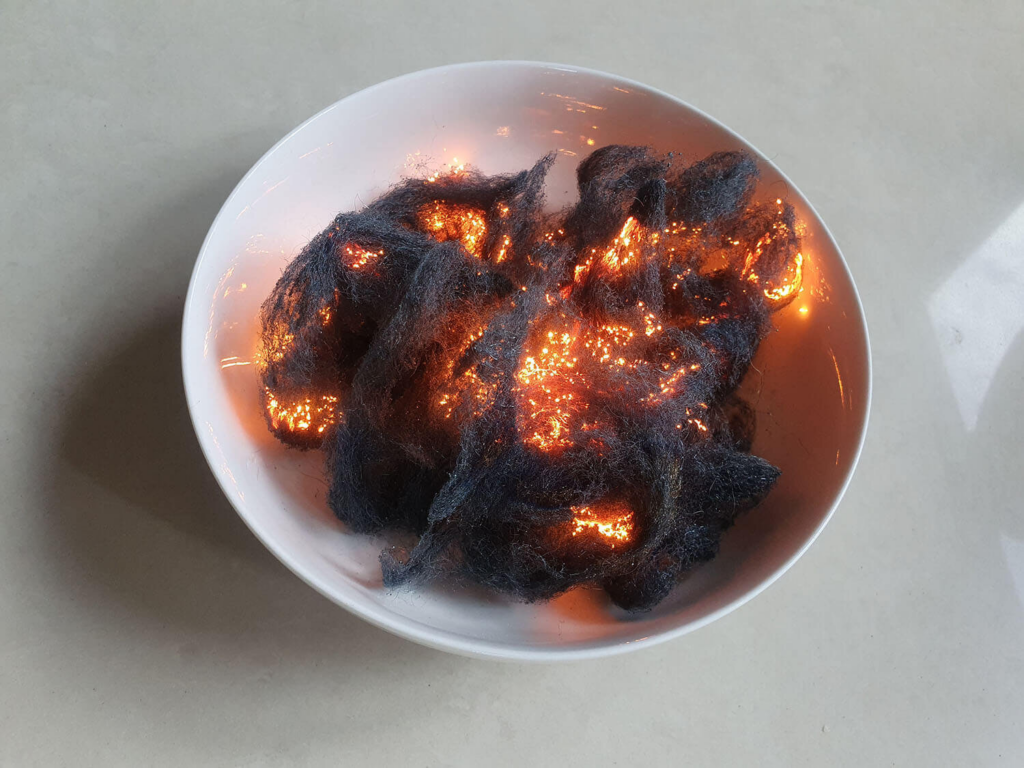
[Image source: https://www.upstartmag.co.nz/]
When conducting this in class, show the students the burning steel wool and ask them to predict the change in mass. Most pupils believe that the mass will rise or decrease. This phenomena can be used at the start of a chemical reactions course, allowing students to investigate their own models. (For example, mass is derived from fire, oxygen, and carbon.)
Steel wool (iron) will burn slowly in air since it contains around 20% (by volume) oxygen. When steel wool is exposed to 100% oxygen, the reaction accelerates and intensifies significantly.
4Fe (s) +3O2 (g) → 2Fe2O3 (s)
CAUTION: Once the steel wool begins to burn, do not touch the sides of the bowl because they will become very hot.
Golden Rain Experiment
This is a great experiment that may be used to illustrate solubility, crystallization, and precipitation. The Golden Rain Experiment, named for its stunning similarity to a waterfall of sparkling golden droplets, is a fascinating chemical investigation. This brings together the art of chemistry and the wonders of physics. The Golden Rain experiment provides a fascinating peek into the complex interplay of matter and energy. The lead iodide (PbI) crystals formed by recrystallization as a result of this experiment are gold-colored, and when the heated solution cools, they settle like gold particles, giving rise to the term “golden rain”.
Lead nitrate reacts with potassium iodide to form a lovely precipitate, as we will demonstrate. The reaction, known as the “Golden Rain” experiment, creates magnificent hexagonal crystals of lead iodide that like gold plates and serves as an excellent chemistry demonstration.
The golden rain reaction makes use of the enhanced solubility of lead iodide in hot water. At 80 degrees Celsius, stoichiometric proportions of lead nitrate and potassium iodide are mixed with enough water to dissolve the lead iodide precipitates. When the solution cools, beautiful lead iodide crystals will precipitate.
[Image source: https://chemistrytalk.org/]
Here is the equation for the double-replacement reaction. Lead II nitrate interacts with potassium iodide to produce lead (II) iodide and potassium nitrate.
Pb(NO3)2 + 2KI ⟶ PbI2 + 2KNO3
Net ionic equation: Pb+2 + 2I– ⟶ PbI2(s)
During this process, lead is in the +2 oxidation state. Lead (IV) iodide does not exist since lead (IV) oxidizes iodide to iodine. Don’t use too much iodide, or this reaction will occur, resulting in the soluble, colorless tetraiodoplumbate(II) complex.
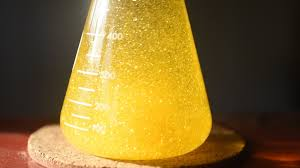
Color Change Chemiluminescent
A color chemiluminescent reaction is an eye-catching science display or chemistry experiment. The reaction first flashes red, then blue. It’s ideal for a chemistry lesson in high school or college, as well as a general presentation to pique students’ curiosity in luminescence. The chemiluminescent process exemplifies two oxidation reactions. Many people are familiar with the blue glow that results from luminol oxidation. However, few have seen the red glow that precedes it, which is caused by singlet molecular oxygen (1O2). Alkaline hydrogen peroxide oxidizes pyrogallol and formaldehyde, producing singlet oxygen. The reaction lights dimly in the presence of either pyrogallol (or gallic acid) or formaldehyde, but it is brighter when both are present.
The red chemiluminescent process produces froth and heat, causing luminol to oxidize.
The mechanism of the reaction is complicated, although it appears to involve free radicals. The luminol begins to shine after the oxygen chemiluminescence has ended. So the two colors are unique.
CAUTION: Wear gloves and eye protection. Avoid touching, inhaling, or consuming sodium hydroxide, formaldehyde, luminol, pyrogallol, or hydrogen peroxide. Pyrogallol and formaldehyde are recognized poisons. Hydrogen peroxide is a powerful oxidant. Sodium hydroxide is a corrosive strong base.
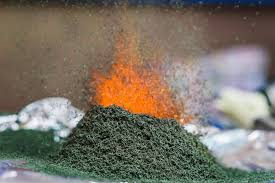
Ammonium Dichromate Volcano
Ammonium dichromate volcanoes are classic chemical demonstrations. This particular chemical volcano is also known as “Vesuvius fire.” It’s the most realistic chemical volcano, with flaming orange embers, steam, sparks, and plenty of dark green ash. The volcano sparks curiosity about chemistry and is a wonderful illustration of a decomposition reaction, an exothermic reaction, and a chemical change.
In this demonstration experiment, students observe a dramatic exothermic breakdown event when a little conical mound of orange ammonium dichromate (VI) is torched. The reaction mimics a volcanic eruption, resulting in sparks, a vast volume of green chromium(ll) oxide ‘ash’, steam, and nitrogen gas.
The demonstration can be used to demonstrate chemical change because the results differ significantly from the starting substance. The reaction is a clear example of an exothermic decomposition reaction. The energy released warms the items while also producing steam and sparkles.
Orange ammonium dichromate decomposes to green chromium(III) oxide, water vapor, and nitrogen gas.
(NH4)2Cr2O7 → Cr2O3 + 4 H2O + N2
Initially, the ammonium dichromate crystals darken, most likely due to ammonia loss and anion condensation caused by the oxidation state shift to chromium(III) oxide. The chemical volcano most likely contains molten “lava” in the form of liquid CrO3, but this intermediate (if it exists) is temporary.
The reaction’s result, Cr2O3, is known as “viridian” or “chromia.” It serves as a pigment in ink, paint, and glass.
CAUTION: When working with ammonium dichromate (or any other chromium compound), always wear gloves and safety goggles. Work in a well-ventilated location, ideally with a ventilation hood.
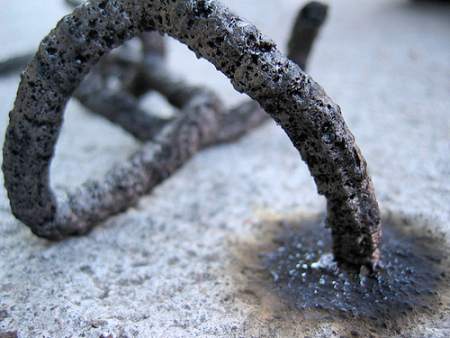
Thermite Reaction
The thermite reaction is one of the most incredible chemical reactions you can do. You’re effectively burning metal, but considerably faster than the normal rate of oxidation. It is a simple reaction that has practical applications (for example, welding). Don’t be scared to try it, but take necessary safety precautions because the reaction is highly exothermic and may be hazardous.
The thermite reaction occurs between a metal and a metal oxide, with the metal having a greater reactivity series than the oxide. So, technically, any two metals will work. Aluminum, on the other hand, is virtually always the preferred metal due to its low cost and widespread availability. For the same reasons, chemical demonstrations typically use iron(III) oxide or iron(II) oxide. In practical applications, a variety of oxides are used. These are iron oxide, manganese oxide (MnO2), chromium oxide (Cr2O2), and copper(II) oxide (CuO).
Aluminum replaces metal in the oxide. This is because aluminium is more reactive than iron. The reaction between aluminum and iron(III) oxide produces iron and aluminum oxide while releasing a lot of heat:
2 Al(s) + Fe2O3(s) → 2 Fe(s) + Al2O3(s) ΔH° = -850 kJ
As a result, the reaction demonstrates iron oxide combustion, oxidation, and oxidation-reduction, as one metal is oxidized while the other is reduced.
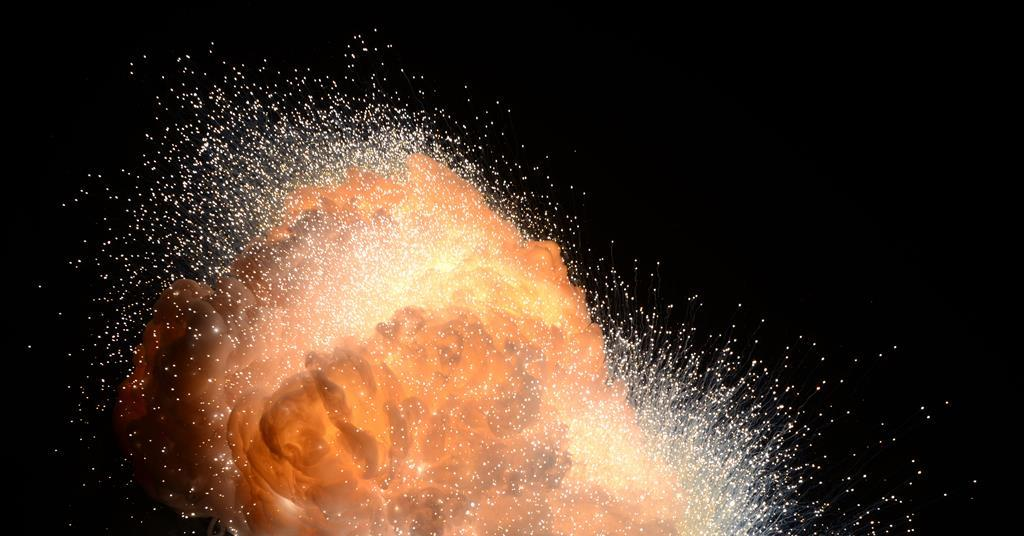
[Image source: https://edu.rsc.org/]
CAUTION: Be careful with following things:
- The molten iron is white hot. Do not touch it with bare hand.
- Never combine water and glass to catch molten thermite.
- Make sure there is a dip in the sand to collect the molten metal. Make sure the molten iron falls into the sand and does not strike the bucket’s sides.
- Avoid causing an excessively large reaction!
- The reaction is highly exothermic! Everyone needs to stand back!
- Stay away from all combustible objects, such as papers, backpacks, and projector screens.
Stalagmite and stalactite experiment
Stalactites and stalagmites are large crystals that form in caves. Stalactites grow down from the roof, whereas stalagmites grow up from the floor.
Dripping water enters a cave, forming stalactites and stalagmites. When water drips through a cave, a mineral is dissolved and accumulates over time. Stalactites are minerals that have been deposited and hang down from the cave’s ceiling, whereas stalagmites are minerals that have been deposited and have piled up on the cave floor. The world’s largest stalagmite, measuring 32.6 meters in length, is found in a cave in Slovakia.
With baking soda, you may create your own stalagmites and stalactites. It’s a straightforward, non-toxic crystal project. Your crystals won’t be as large as the Slovakian stalagmite, but they will form in a week rather than thousands of years!
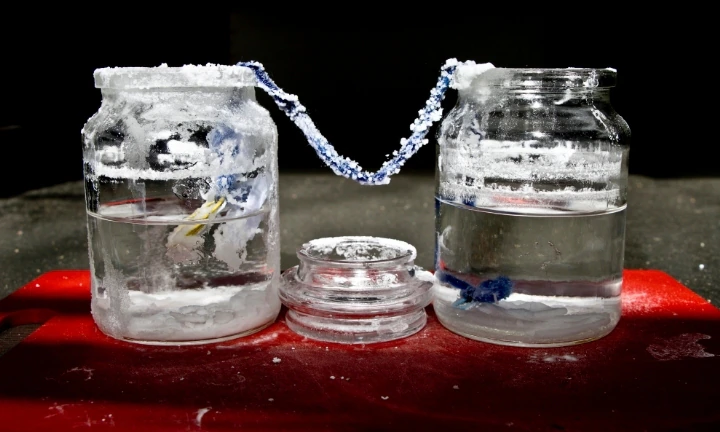
[Image source: https://www.kidspot.com.au/]
To conduct this chemistry project, you will need: Baking Soda, Safety Pins, Two glass jars., Wool yarn, and Water.
This scientific exploration is straightforward, but it takes time. The optimum outcomes require one week, however stalactites began to form on our second day.
To create your own stalactite:
First, pour warm water into two glass jars. Next, add baking soda until the mixture is supersaturated, which means no more baking soda can dissolve in the water. We kept adding baking soda until we could see some remaining at the bottom of the jars – a surprising quantity was dissolved!
Then, knot the safety pins onto both ends of the wool yarn and insert the ends into the two jars.
Over time, the wool yarn sucks up the baking soda/water mixture. As the water evaporates, the baking soda remains behind, making the cave stalactites. If you’re lucky, stalagmites may form beneath the wool yarn on the counter (or a dish).
Making Colorful Fire
To create a lively and colorful campfire or fireplace show, soak pine cones, wood chips, or newspaper rolls in chemical solutions before burning. Whether for personal use or as a club/group project, we explain how to make these flame displays and what materials to use.
| Flame Color | Chemical |
| Blue | Cupric chloride |
| Red | Lithium chloride |
| Red | Strontium chloride |
| Green | Cupric sulfate |
| Orange | Borax (Sodium borate) |
| Orange | Calcium chloride |
| Purple | Potassium chloride |
| Yellow | Sodium chloride |
| Yellow | Sodium carbonate |
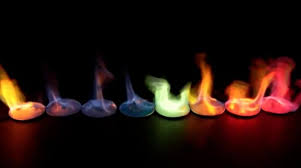
[Image source: https://scienceonblog.wordpress.com/]
Burning a little amount of different metal salts in a fire produces a range of colored flames. In the laboratory, use a Bunsen burner or propane torch.
Simply sprinkle salt on the flames to tint them. Here is a list of colorants, the colors they generate, and where they can be found.
When a metal or metal salt is burned, the thermal energy intake causes the electrons in the metal atom to reach a higher energy state. These electrons cannot remain in this excited state for long, so they emit energy in the form of light to return to a more stable, grounded state. This is the light that we see when a metal atom burns in a flame.
Each metal has a distinct flame color that can be used to identify minerals.
| Flame Color | Chemical |
| Carmine | Lithium Chloride |
| Red | Strontium Chloride or Strontium Nitrate |
| Pink | Strontium Chloride + Potassium Nitrate |
| Orange | Calcium Chloride (bleaching powder) |
| Yellow | Sodium Chloride (table salt)/Sodium Carbonate |
| Yellowish Green | Borax |
| Green | Copper Sulfate/ Boric Acid |
| Blue | Copper Chloride |
| Violet | Potassium Sulfate (3 parts) + Potassium Nitrate (1 part) |
| Purple | Potassium Chloride |
| White | Magnesium Sulfate (Epsom salts) |
CAUTION:
- If you use alcohol as a fuel, keep in mind that it burns considerably more quickly than wood. Never add alcohol (or any other liquid fuel) to a burning fire; it will react much like lighter fluid!
- Flame colorants, like other household chemicals, should be kept away from children and pets. Read and heed any cautions on chemical containers.
Making Black Snake
This experiment is also referred to as the Black Snake, Black Cobra, or Sugar Snake firework. This experiment enables students to safely work with fire in the classroom! Students add a mixture of baking soda and sugar to a pile of sand. Alcohol is sprinkled on the beach and then set on fire! The black snake emerges from the sand nearly instantly!
When you lit the lighter fluid on fire, the sugar and baking soda mixture began to burn. As it burned, gas bubbles became trapped, forming the black “snake” structure that ascended from the flames. The snake grows slowly and could take 10-20 minutes to reach full size. It may surprise you that the snake is so large and appears to appear out of nowhere, but if you wait for it to cool before poking or picking it up, you will notice that it is exceedingly lightweight, similar to foam.
[Image source: https://eisforexplore.blogspot.com/]
Table sugar, or sucrose, is a carbon-rich chemical molecule. The molecular formula is C12H22O11. Sugar may be oxidized, which means it can combine with oxygen to generate other compounds. When exposed to an open flame, sugar swiftly burns and reacts with the oxygen in the air. This is known as a combustion reaction. The final products are carbon dioxide (CO2) and water (H2O). If there is insufficient oxygen during burning to produce CO2, a different process occurs. In this situation, the sugar decomposes, yielding elemental black carbon (C), or charcoal.
Baking soda (sodium bicarbonate, NaHCO3) decomposes at high temperatures, emitting large amounts of CO2. The increased production of CO2 results in a scarcity of oxygen. This signifies that there isn’t enough oxygen to convert all of the sugar into CO2 and water through a combustion process. Instead, portion of the sugar decomposes into elemental carbon, resulting in the solid black snake-like shape. The carbon dioxide gas and water vapor cause the sugar and baking soda mixture to rise. At the same time, the gasses become trapped in the solid carbon, resulting in the lightweight foam snake that emerges from the sand.
Videos on 10 Best Chemistry Projects for High School
References
- Helmenstine, Anne Marie, Ph.D. “10 Cool Chemistry Experiments.” ThoughtCo, May. 5, 2024, thoughtco.com/cool-chemistry-experiments-604271.
- https://www.vedantu.com/blog/list-of-cool-chemistry-experiments
- https://sciencenotes.org/cool-chemistry-experiments/
- https://www.sciencebuddies.org/stem-activities/make-a-fire-snake#exploremore
- https://www.sciencebuddies.org/science-fair-projects/project-ideas/chemistry
- https://edu.rsc.org/resources/collections/classic-chemistry-demonstrations